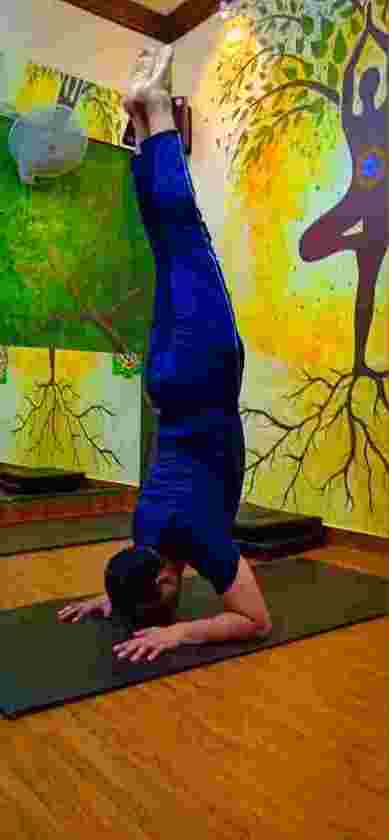
The forearm stand makes you more stable than the handstand because of the larger foundation that the forearms give. The prerequisites, however, are strength and openness, and those can be quite challenging. Take your time to ease out into this pose, no matter how long it takes.
How To Do The Pincha Mayurasana And What Are Its Benefits
You must make sure to keep your stomach and bowels empty before you practice this asana. Have your meals at least four to six hours before you do the asana so that your food gets digested and there is enough energy for you to expend during the practice. It is best to practice yoga first thing in the morning. But in the event you cannot work out in the morning, it is alright to practice it in the evening Level: Intermediate/Advanced Style: Ashtanga Yoga Duration: 1 to 5 minutes How To Do The Pincha Mayurasana These are a few points of caution you must keep in mind before you do this asana. As beginners, it might be difficult to stop your elbows from sliding away from each other when you assume this pose. Slip a strap over your upper arms, locking it just above the elbows. Then, stretch out your arms in front such that they are shoulder width apart. Adjust the strap such that it hugs the outer part of the arms. Now that your posture is set, use the strap to assist you in the pose. Push the arms slightly away from the strap instead of letting them bulge out into the strap. This is an advanced pose in itself. So with practice, as you begin to get comfortable in this pose, try to let go of the props, and move away from the wall. This will be a pose advancement in itself. These are some amazing Pincha Mayurasana benefits. This asana takes years to master. You will become humble and let go of your ego as you aspire to achieve this pose. For ease, you can enter this pose by doing a split leg or by bending your knees. Your goal must be to move towards the centerline and seek the vertical axis as you are in the posture. Remember to spread your shoulders, firm your thighs, engage your spine, and to keep your toes pointed. Your body should be pulled into a straight line through the center channel. The key is to lift up so that you do not collapse into the lower back. Prepare yourself as you warm up with the preparatory poses, and find your balance when you finally enter the pose. Adho Mukha Vrikshasana Adho Mukha VrikshasanaThe Pincha Mayurasana is a forearm stand and is also called the Feathered Peacock Pose. Just like a peacock that spans its feathers out, this asana is a beautiful, showy pose, which needs both skill and patience to perfect.
Everything You Need To Know About Pincha Mayurasana
What You Should Know Before You Do This Asana
Repetition: None
Stretches: Shoulders, Thorax, Neck, Navel
Strengthens: Arms, Shoulders, BackPrecautions And Contraindications
Beginner’s Tips
Advanced Pose Variations
The Benefits Of The Feathered Peacock Pose
The Science Behind The Pincha Mayurasana
Preparatory Poses
Adho Mukha Svanasana
Gomukhasana
Prasarita Padottanasana
Supta Virasana
UttanasanaFollow-Up Poses
Adho Mukha Svanasana
Gomukhasana
Sirsasana
